Wednesday, February 20, 2013

Rainbow Dress

I just realized I never blogged one of my favorite things I've ever made for my Madeline. And in honor of her turning 5 (FIVE!) yesterday, I thought today would be a good day.

It's just a simple peasant bodice - I'm telling you guys, once you understand the construction of a peasant bodice, it takes under 30 minutes to construct one. Then you get to be creative with the skirt!


 I wanted Madeline's to be super twirly, so each tier is approx. 50% longer than the tier above it.


See? Super twirly. She LOVES this dress.


A customer asked me to recreate it for her daughters birthday and together we came up with this color combination:

I really, really love this one too! Such happy, fun colors!

Ok, that's all! Just a quick fly-by so I don't break my self-imposed rule of going more than a month without blogging!

Molly

Wednesday, February 6, 2013

Easter Dress Pattern Round-up

Every year about this time, I start on my quest to find the perfect Easter dress pattern for Maddie. I thought it might be fun (and helpful for someone, maybe?) to show you my favorite new patterns that I've discovered this year. Maddie's dress is going to end up as a big mash-up of a few of them, but they are all darling on their own! (You can see past Easter dresses I've made here, here and here.)

Argyle Party Dress Pattern  $8
I looove the collar on this one.
The Clara Dress by Olabelhe
If you are into old-fashioned, darling dresses for little girls, you must check out the amazing patterns on this website. The "Clara" is one of my favorites, and it would be perfect for a chilly Easter that lands in March!


The little scalloped bib really transforms a simple dress into something special. This won't be Maddie's Easter dress, but I definitely see a dress like this in her future.


I.love.this.dress. I'm thinking about adding sleeves to make it a little warmer for Easter...

Adorable. 

Love the bib and the pick up skirt. LOVE this blog, by the way. Tons of great clothing tutorials.

I think a pattern is emerging here...I'm all about the details. This one has it all. Oversized pockets, contrasting patterns, and a bib (with buttons!). I used a modkid pattern for Maddie's dress last year, so I'm obviously already a fan of their work. 


The possiblities with this one are endless. 


As always, my go-to pattern for bodice and sleeve pieces is The Precious Dress.


I'm also working on Maddie's dress for her 5th birthday party, so some of these elements are going to work their way into that dress as well. 

What's your go-to dress pattern? What are you loving right now?

Molly

Friday, January 25, 2013

Tap, tap...anyone there?

Hello, bloggy land! Did you miss me? Wait, don't answer that.

Although I haven't blogged in 6 months (!!!), that doesn't mean I haven't been busy crafting, sewing and crocheting. In fact, quite to the contrary. The good news is that I always photograph everything I make with the intention of sharing it here, so I now have enough blog material for rest of the year. ;)

Let's dive right into it, shall we? How about a crafty Christmas wrap-up?

First up, a queen anne's lace scarf.  It's a little messy looking if you don't block it, but some light blocking worked wonders! I know I always say this, but I want one for me now!

 Queen Anne's lace scarf 
I made two of these doll sets for my sister and niece's American Girl dolls. Apparently the fit is not great, though. Guess I need to pay attention to gauge when I'm crocheting clothes!

 Doll Set 

This Christmas runner was for my mother-in-law. I made another one in a different print my my mom, but forgot to take a picture.

 Pinwheel Christmas Runner 
This bag was for my sister Katie. I actually bought a pattern for this one, which I rarely do, but in this case it was totally worth it. Terrible picture, but I'll definitely be making another one like this for me. I scaled the pattern down for Katie's purse, but the original pattern, the two zip hipster, can be found here

Katie's bag 
Some wool wrist warmers for my sister Hannah: 

Wool wrist warmers 
This was my first time experimenting with crocheted cables and it couldn't have been easier. This was for my sister and her almost-fiance, a quote from Song of Solomon: 

"I have found the one" embroidery 
And a framed hymn for said almost-fiance (his favorite): 

Framed Hymn 

An reversible apron and matching hot pad for my sister Rosie: 

Vintage Inspired Apron
(Tutorial is here. The end result was fantastic, but it was a pain.in.the.butt.)

 Modern pinwheel pot holder 

I didn't really do much homemade for the kids this year, but I did refinish a little table for Maddie to use as a vanity. She looooves it and uses it every day, so that was a win!

 Maddie's vanity 

I was pretty crafty this year with my home decor this year and finally made new stockings for the four of us. But I'll wait until Christmas time to share those - no one feels very Christmassy in January! Alrighty! Signing off for what I hope is not another 6 months...

Molly

Wednesday, August 29, 2012

Will's Cowboy Room

Photobucket

We chose to be surprised by the gender of both of our children. Which is SO fun. I highly recommend it. The only downside is that it makes planning the baby's nursery a real challenge. With both of our kids, I ended up waiting until they were here to start planning the decor for their rooms.

Will's room started with his quilt. I wanted to go with a farm/vintage western theme and thought the little stars in Make Life fabric was perfect (think sheriff's badge). Of course, by the time he got here and I got my act together I had to really scrounge to find more fabric in that line to be able to make his bumpers, crib skirt and curtains.

Photobucket

Photobucket

Photobucket

Photobucket

Justin grew up around horses and rodeos and his grandfather still has many horses, so this seemed like a theme that Will could grow into. As you can see from the pictures, nothing is permanent, so this blue room could easily be transformed something completely different down the road.

My favorite part of his room is the photos. Below you can see Will's great grandfather with one of his first horses at age 18, then Justin plowing with his grandfather, an old newspaper cut out of Will's grandpa and his daddy as a little boy at a county fair and then Justin showing sheep at a 4-H fair. I have a few more old photos that still need to be enlarged and framed - then they can also find a home on Will's walls.

Photobucket

Photobucket

On his dresser below you can see Daddy's bull riding buckles and a trophy from a horse camp he won when he was 12.

Photobucket

I store his toys in a wooden crate my sister personalized for him and a wicker basket. Larger toys are stored under the crib and on the bottom shelf of his changing table. The closet is still overflowing with my fabric and craft supplies, so he'll just have to live without that for a little while. ;)

Photobucket

I didn't have a full vision for this room when I began, but it came all came together and I'm really happy with it. It's functional, simple and personal. :)

Molly

Notes:
The fabric for the quilt, bumper, crib skirt, curtains, sheet and bunting is from the Make Life by Sweetwater line. You can still find bits and pieces of it on Etsy.
The bumper form was an old pottery barn bumper I bought at a yard sale and recovered.
The mirror and spurs and lone ranger tin and cowboy cut-out came from Hobby Lobby.
The ceramic boots came from Happy Harry's (I purchased those years ago!)
The wood pallet bookshelf is a DIY project I blogged about here.
The dresser was a $25 thrift store upcycle. I sanded, repainted and used rope instead of replacing the hardware.
The "W" above the crib was purchased from this Esty seller - I HIGHLY recommend.
The name puzzle came from this Etsy seller. Another gem! They don't have puzzles listed in their shop, but they will do custom orders if you ask. 

Wood Pallet Bookshelf - a mini tutorial

Photobucket

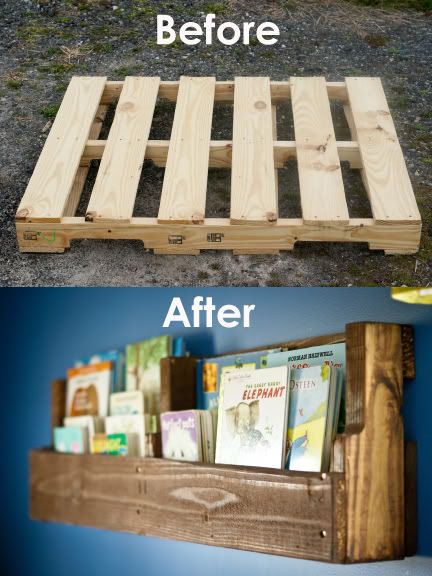
When I saw this project on Pinterest, I knew I just *had* to make it for Will's room. Luckily, my hubby was able to get his hands on a wood pallet for me. When he brought it home, our conversation went something like this:

"Here's the wood pallet you wanted for that bookshelf."
"Oh, thanks! But...it's so....new."
"Yeah, I got the best one I could find."
"I was kind of hoping for something older and more weathered. Now I'm going to have to beat it with a hammer."
"What? But I thought....I just.....never mind."

I'm pretty sure he's done trying to understand me when it comes to my crafting and DIY projects.

So I loaded my new pallet in my car and headed to my Dad's garage to borrow his tools. Or...just, ummmm, just watch him use his tools.

But in all honesty, this is a pretty basic woodworking project and if you have a saw and a drill, you can totally do it sans husband.

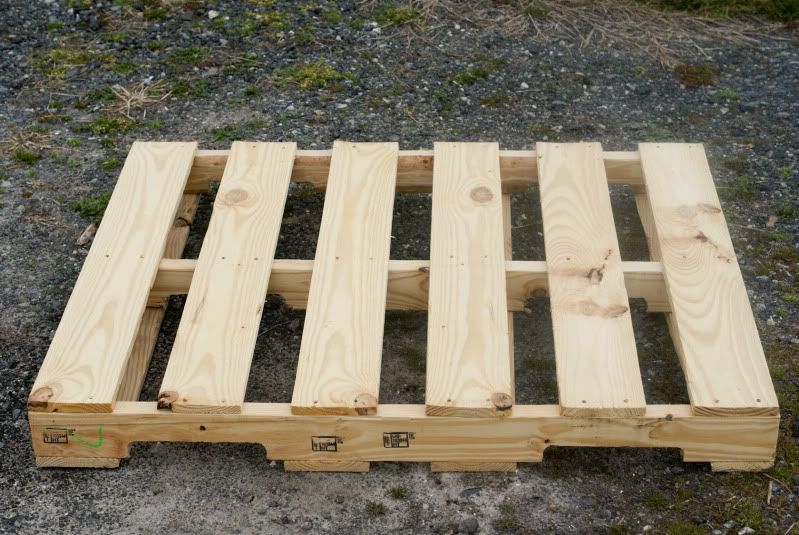
Some wood pallets are slightly different, but they generally look like a variation of this:

Photobucket

Photobucket

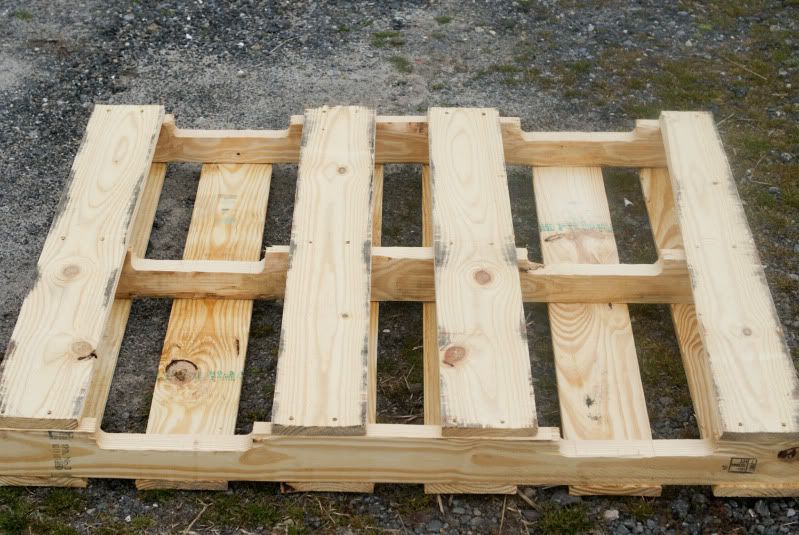
One pallet should make four shelves. Make your cuts as shown in the picture below. Except, you know...straighter.

Photobucket

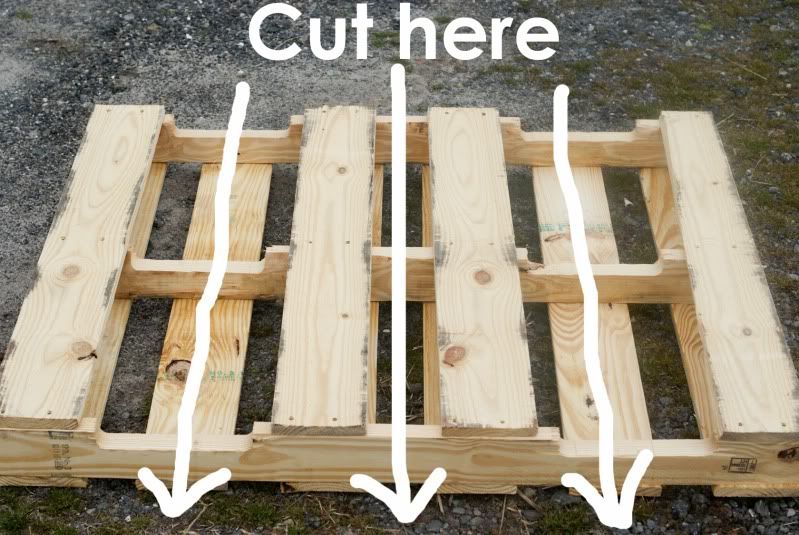
Next, you'll need to measure the inside of the bottoms of your newly made shelves so that you can cut 2x4's to size and screw them in place. Otherwise, all your books will fall out the bottom of your nifty new shelf.

To finish them off, I took a little electric sander and tried to get the edges and corners as smooth as possible. Because I wasn't happy with the new wood, I took a hammer and some nails and scraped to give the wood some more character. Then, I took my can of stain and used a brush to run over the surface of the shelves one time. After each brushstroke I immediately used a rag to rub in the stain.

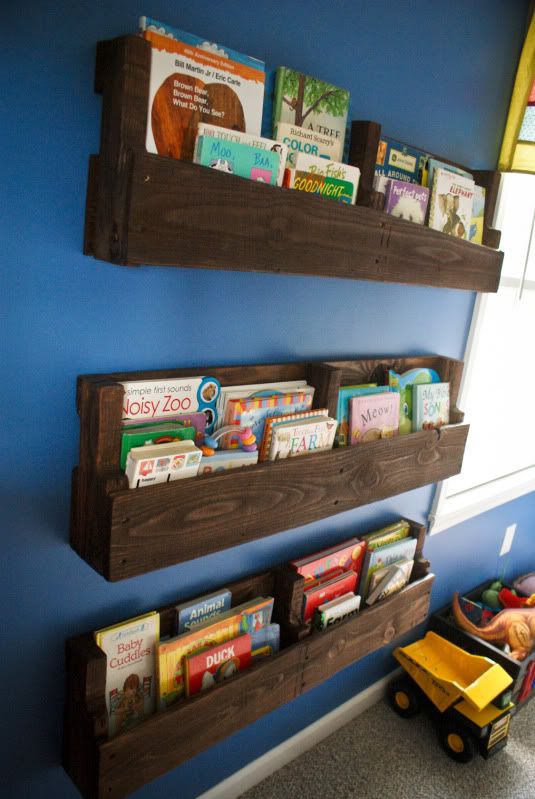
Then I had to wait a week for the smell to wear off before I could bring them in the house. I couldn't wait to get these things on the wall!

Photobucket

Photobucket

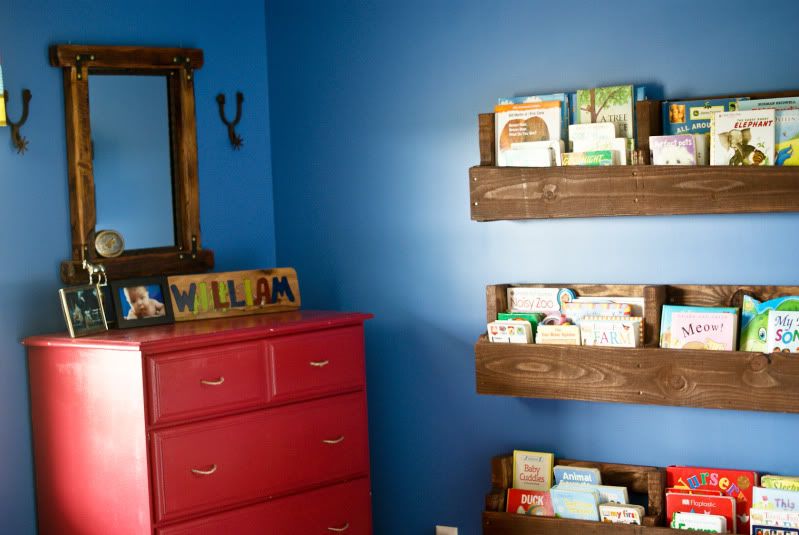
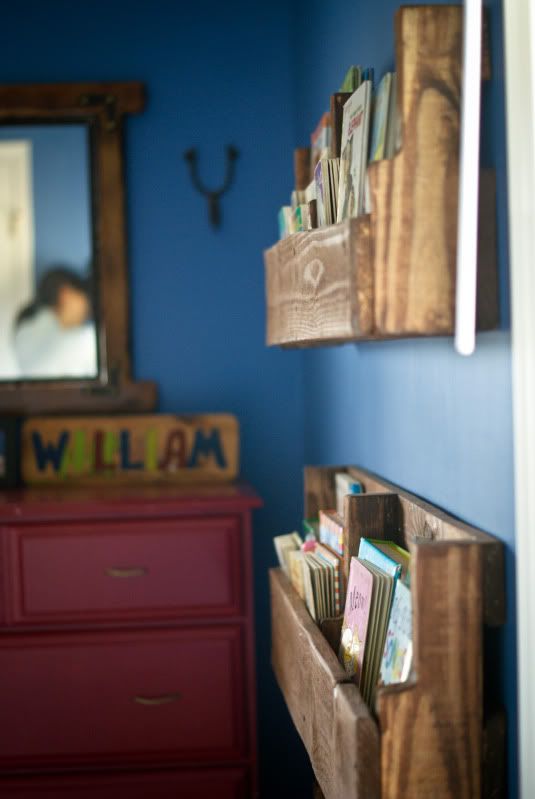
I am SO pleased with how they turned out. They hold a lot more books than I excepted - each shelf holds at least 20-25 books of various sizes - and it's so easy for kids to access and put away their own books.

Photobucket
I have one shelf left that I didn't use in Will's room and I think I'm going to paint it white and use it as a craft supply/coloring book/school book center in our little craft corner. The possibilities are endless! Honestly, I wouldn't mind having a set of these in my living room!

Photobucket

I have pictures of all the DIY projects I did for Will's room, hopefully I'll get that posted this week. I love how it all came together, it's definitely a room he can grow into and hopefully he'll stay interested in horses and cowboys. :)

Molly