Thursday, March 10, 2011

Maddie and Will

I think it's safe to say that she loves her little brother...


Photobucket

Friday, March 4, 2011

Worth the Wait

Introducing our new baby boy!
William Oren
March 3, 2011, 1:30pm
9 lbs, 12 oz. 21 inches

Photobucket

Tuesday, March 1, 2011

Covering my bases...

The biggest downside to not finding out the gender of your baby before birth is not being able to buy and make gender-specific baby stuff. I really wanted to make a special blanket for the new baby, but I couldn't decide on a fabric that would work for a boy or a girl. So... I made two!

If it's a boy...

Official "if it's a boy" quilt


Boy Quilt


Boy Quilt

I was inspired by this amazing quilt (it was her "if it's a boy" quilt too!) - and I'm really happy with how my version came out! The fabric is "Make Life" by Sweetwater, and it's the perfect color scheme for the blue room that will become the nursery if it's a boy.

If it's a girl...

Chenille Backed baby quilt


Chenille Baby Blanket


Yummy chenille!

First of all, this might be my favorite fabric ever. It's Amy Butler Water Lilies and I've been hanging on to this large piece for a looong time waiting for a worthy enough project to use it on. I used this tutorial for blanket, which involves hand-made chenille. Even though it has a solid front - this one probably took me about three times as long as the "boy" quilt. But it was SO worth the time. The flannel chenille is super soft and totally worth all the hand cramps i got from cutting all those layers of fabric. I LOVE this blanket.


So whenever this little baby decides to arrive, he or she will have a cozy blanket to snuggle in. Yes, this means I'm still pregnant...what are you waiting on, little one?

Molly

Monday, February 21, 2011

A Pink Party!

Last Saturday we celebrated Maddie's 3rd birthday. I can't believe it's been THREE years since that February day that I gave birth to her. Time has just flown by. I knew I would be very pregnant for her party so I really tried to keep it simple and not overwhelm myself with a lot of home made details.

While we wait on baby - and I finish up my baby projects - I thought I'd share just a few images from her very pink party.

A pink ruffle cake! My sister, cake decorator extraordinaire, piped the ruffles on. (Thanks for the idea, Martha!) The cake bunting turned out a little big, but still worked!

Photobucket

Pink cupcakes!

Photobucket

A very happy birthday girl!

Photobucket

Photobucket

And in case you were wondering...nope, she's not a big sister *quite* yet. I'm 41 weeks today, so it's got to be soon, right?
Molly

Thursday, February 10, 2011

Twirly Birthday Dress!

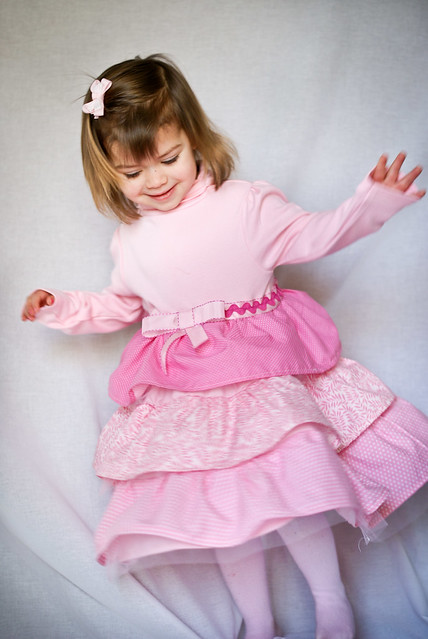
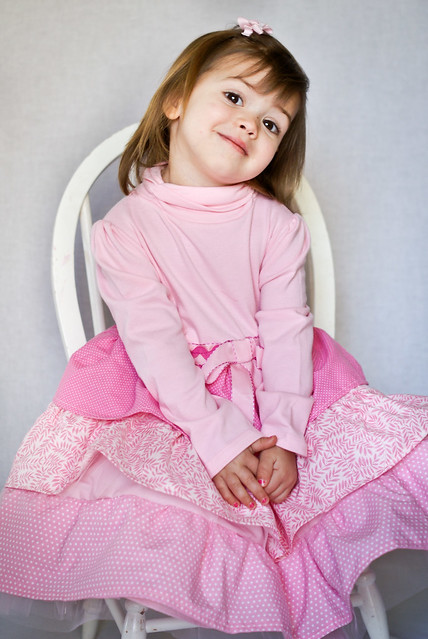
Last year for Madeline's birthday, I made her a special birthday outfit, and I thought it would be a fun tradition to keep up! This year, we're doing a "pink party" - everything is pink, pink, pink! My girl loves anything girly, frilly and PINK. As I mentioned in my tiered curtain post, the idea for the curtains originated when I was trying to come up with an idea for a frilly, twirly dress for Maddie. I made the curtains first and then got to work on her birthday dress.
DSC03028

She really loves it. Because - a) it's pink and b) it twirls. Does she need any more reasons? I let her try it on for a mini photo-op and had to seriously bribe her to get her to take it off. Every morning she asks if she can wear her "birthday dress". She knows how to make her momma feel good!!
DSC03012

We're trying to beat the baby to the punch by having her birthday party a little early this year - so this little one is under strict orders to stay put until after Saturday. After that? Bring on the baby!!

I've been working on some other little birthday things, I'll share them after the party on Saturday. And then maybe I can finally finish my baby quilts? I'm kind of cutting it close! 6 days!

Notes: I used the same method as I did for the curtains - I just doubled the length of each tier to make it more "twirly". I also sandwiched in a layer of tulle to make it a little more full. To get my first tier width, I measured the turtleneck from armpit to armpit and multipled that number by 4. Then took that number and multiplied it by 2 for tier #2 and so on.
The waistband was an afterthought - I wasn't happy with how the first tier attached to the turtleneck (which I did NOT make, by the way!), so I sewed down a piece of ribbon and ric rac and handsewed the bow on. I think I'm going to add a tie for the back - the dress is so heavy that it does make the knit turtleneck sag a bit. Other than that, I wouldn't change a thing - it came out just like I wanted. (love it when that happens!!)
Molly