


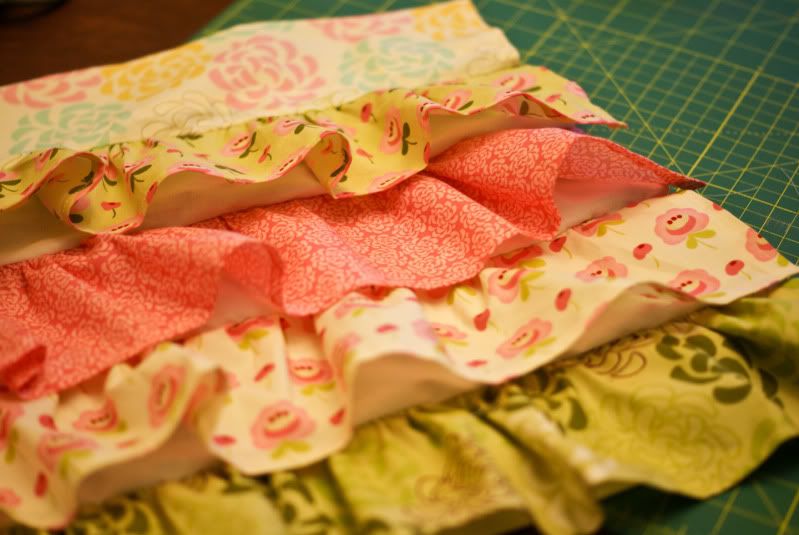
When I bought all the fabric for Madeline's quilt, I made sure I bought plenty of extra matching fabric so I could make pillows, curtains and other accents for her room. I knew I wanted valances, but I could not for the life of me decide what style to make. I knew I wanted something fun and girly, but it's hard to get creative with curtains, right? Wrong!
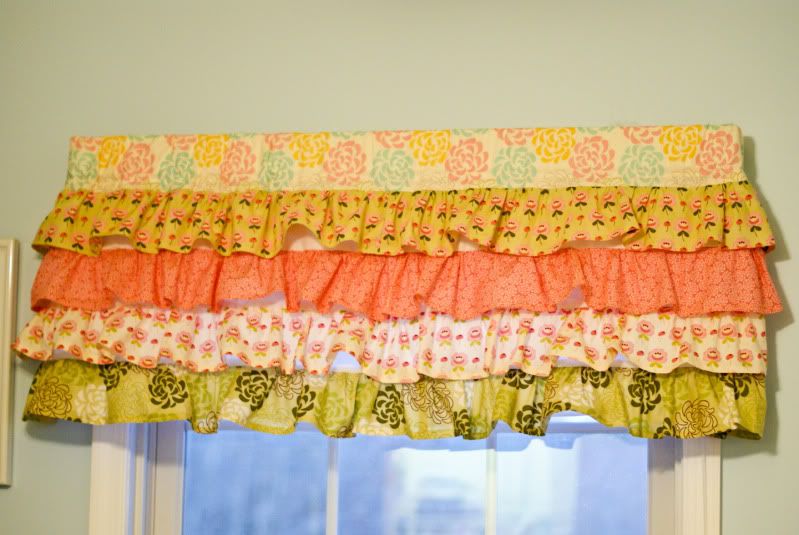
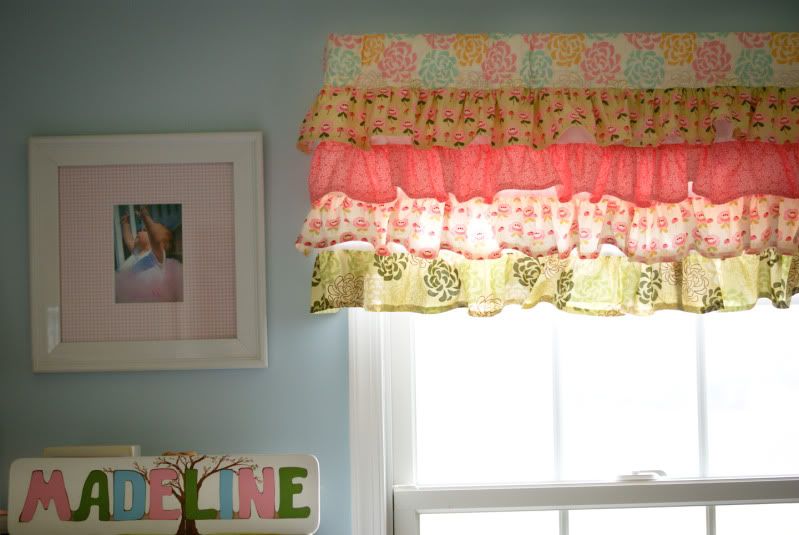
The idea for these curtains actually came when I was sketching out a birthday outfit for my girl and it dawned on me that I could apply the same principle of ruffled tiers to curtains! I am so, so happy with how they came out, and my girl just loves them. Well, as much as an almost 3 year old can love curtains. :)
Cute, right?
I took pictures so I could share a quick tutorial with you guys! These are really pretty simple to make, just a little time consuming.
CUT:
Important note: I made these to fit the 3 inch curtain rods that were already in her room - if you want to make them to fit a traditional pocket rod, you'll need to adjust the pocket measurements. Her windows are 39" wide from molding to molding.
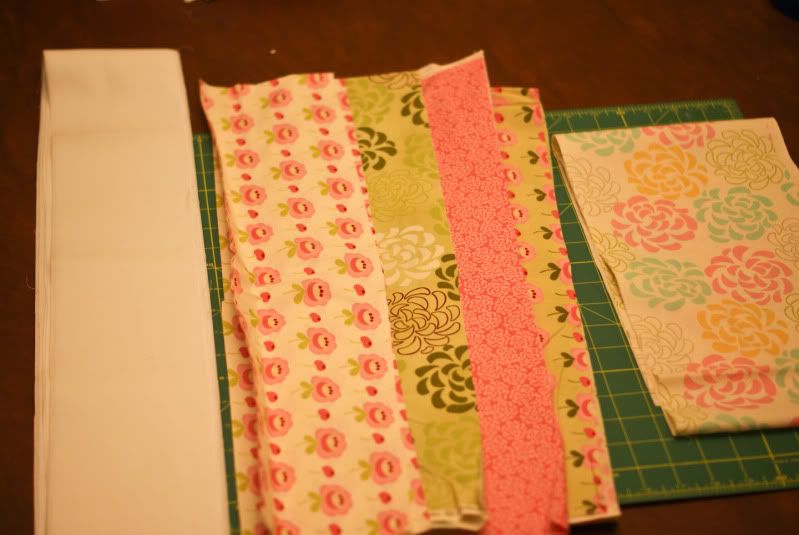
Pocket fabric - This is the fabric that will hold your curtain rod. For my 3" rod, I cut a piece
55" x 7.5" - cut one
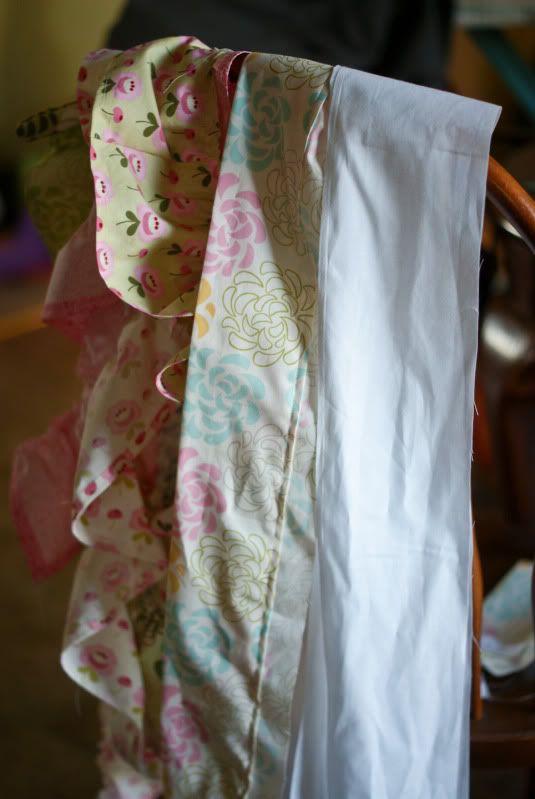
White lining fabric - 55" x 4.5" - cut four
Fabric for tiers - 90" x 5" - cut four (note: Since this is going to be gathered, don't sweat the length of these tiers too much. I wanted to double the length, but my fabric was 45" wide, so I just cut two pieces that I then pieced together to make one long piece. You probably will have to piece these tiers together unless you're working with a large cut of fabric, but since they'll be gathered, the seams will be virtually invisible.)
Okay, now head to your ironing board.
Here is where you need to figure out the width of your curtain rod. Mine is 3", so ironed over a 1/4" and then measured exactly 3 1/4" and folded and ironed the fabric like this:
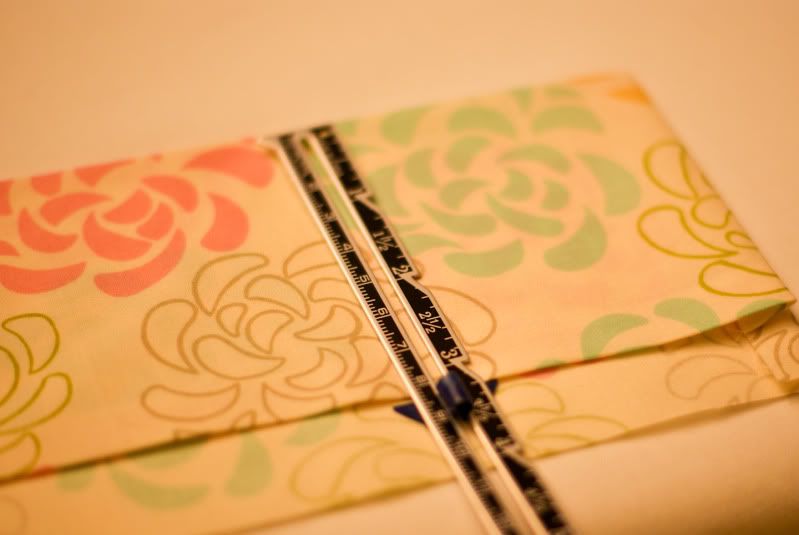
Iron down a 1/4" of the bottom of each tier and the ends of the pocket fabric and white lining pieces.
Only ONE white lining piece will need to be hemmed - the piece attached to the bottom tier. I cheated and used a piece I had cut on the selvage and just trimmed it down an inch so it wouldn't show under the last tier. Otherwise, you'd want to iron and hem this piece up about an inch.
I didn't enclose my raw edge. I kind of figured that 1) no one is going to look and 2) how often do you really wash curtains? They just kind of hang there so I wasn't too worried about durability. If you want to do this, I'd add another 1/4" to your cuts.
Now we're ready to sew! Ready?
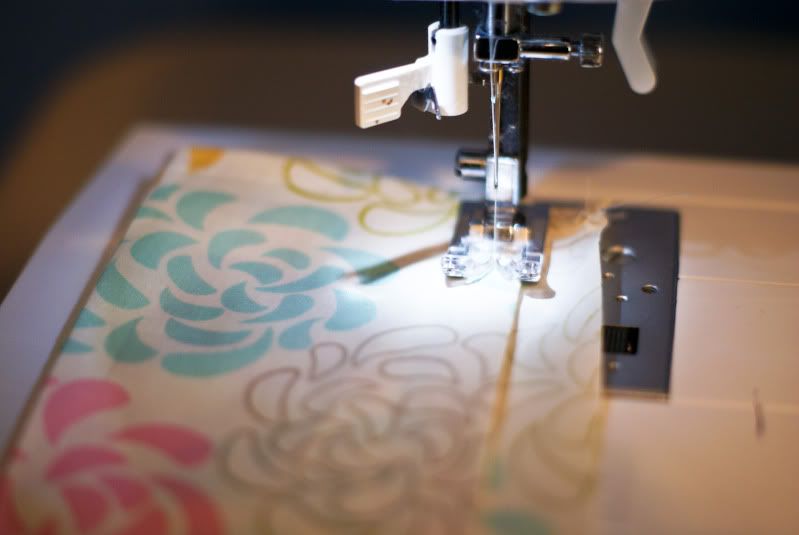
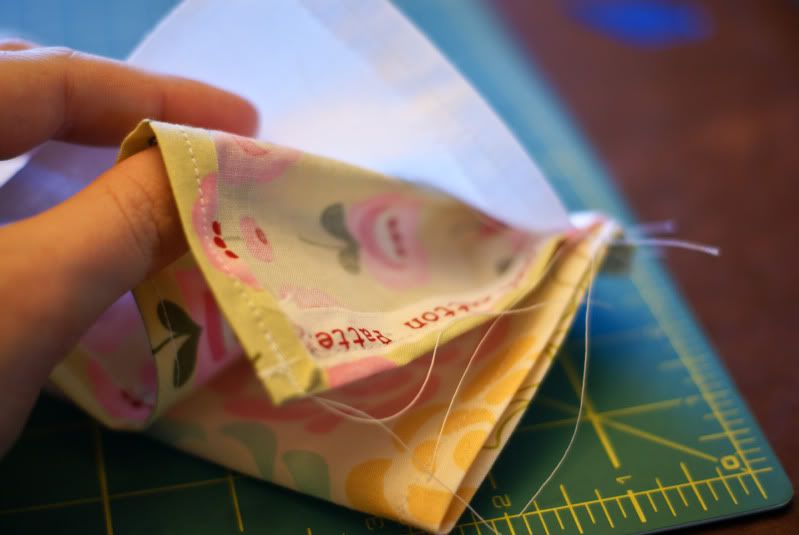
Sew down the ends of your top pocket piece and then sew down the length of the piece, creating the pocket for the curtain rod.
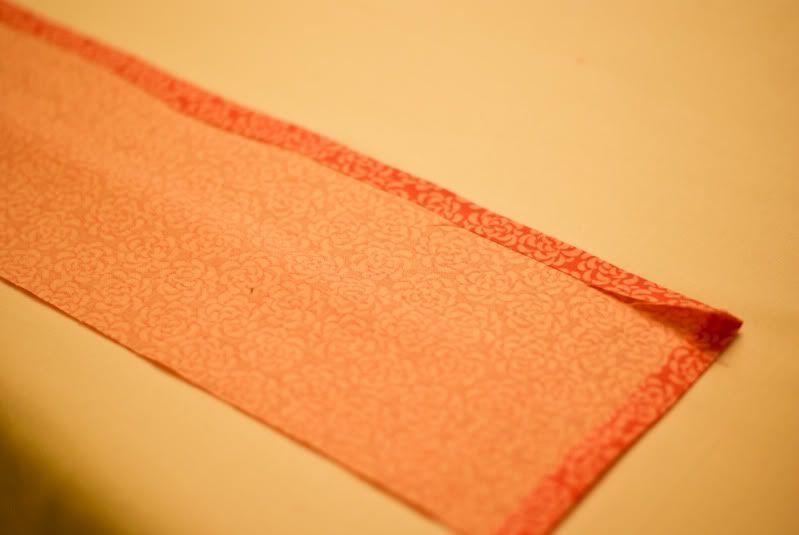
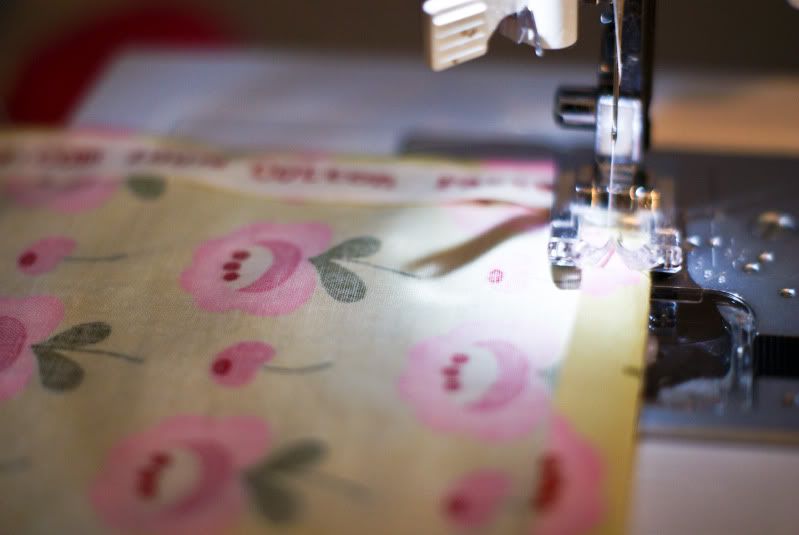
 Sew down the ends of your long tiered pieces and then hem the bottom edge.
Sew down the ends of your white pieces and just hem that one piece. Both edges of the other three will be sewn, so leave those raw.
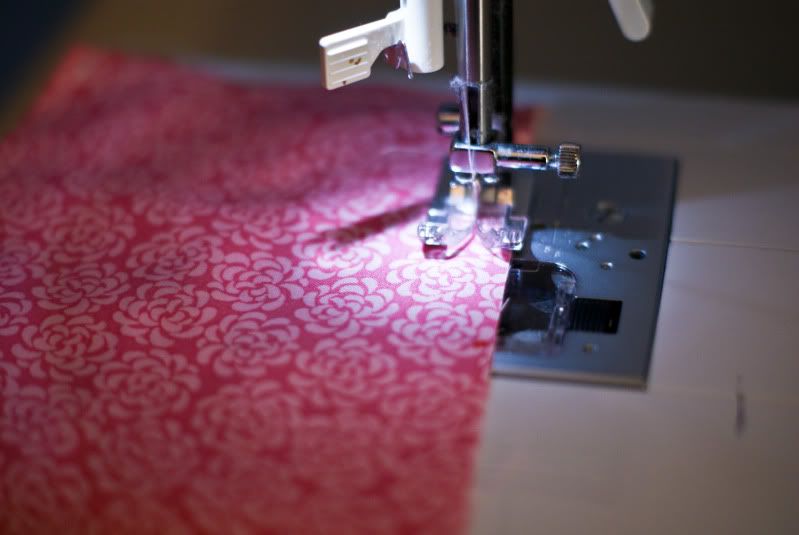
Now we're ready to put in our gathering stitches! Set your stitch length to the longest it will go, give yourself about a 6" tail of thread and sew a straight line 1/4" from the edge along the top of the tier. Don't backstitch! Gather your tiers by gently pulling the bobbin thread. Repeat with all four tiers.
Now we're ready to assemble the valance!
Each tier with have THREE layers. Lay your first tier on top of our pocket piece, right sides facing, raw edges aligned. Now you will need to evenly distribute your gathers along the length of the pocket piece. Lay one of your unhemmed white pieces on top of your gathered piece, sandwiching your gathered tier. Like this:
Pin very well, taking care to make sure that all three raw edges are lined up. I'm a lazy seamstress and if I can get away with not pinning, I will. You NEED to pin this one, folks.
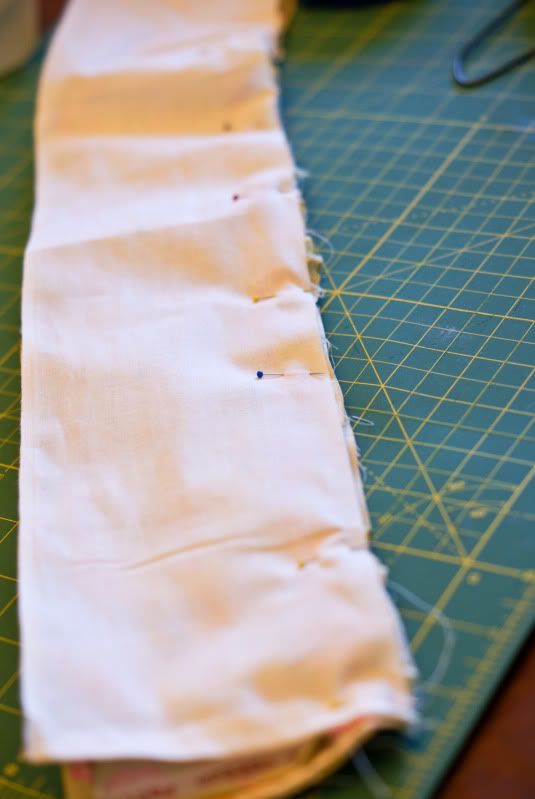
Head to your machine and using a 1/2" seam allowance, sew the three layers together.

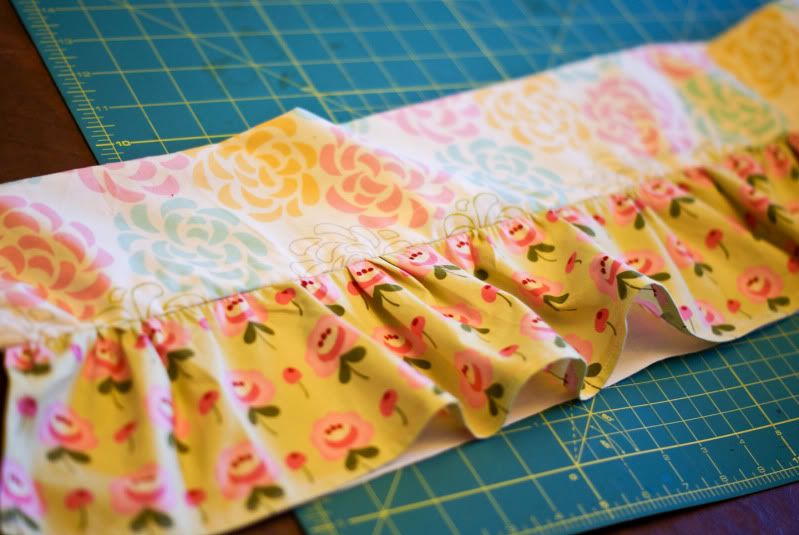
Remove pins and flip down your first tier! Remove any of the gathering stitching that may be visible and iron down. See how pretty?
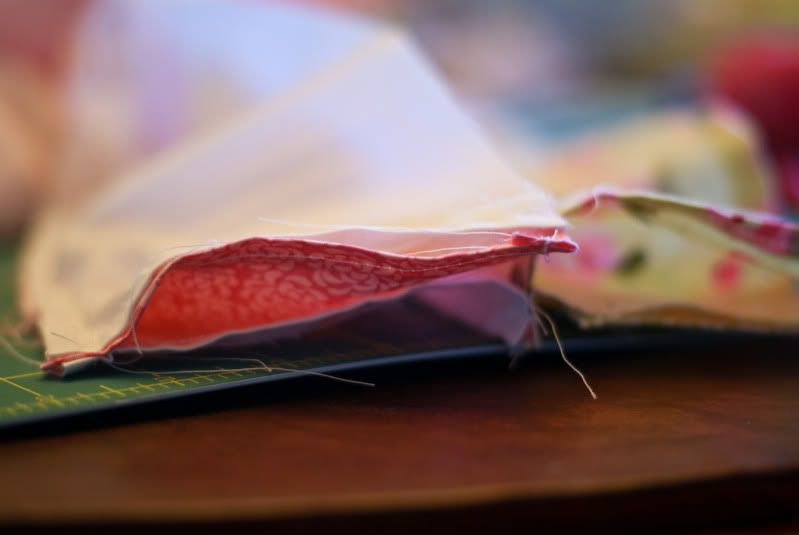
Now continue to attach the remaining tiers in the same way by flipping up the first tier and aligning the raw edge of the white lining piece (see it peeking out up there?) with the raw, gathered edge of the next tier. Distribute gathers, and then sandwich the tier with another white lining piece.
Here's a picture of my 2nd sewn tier. You can see the first tier flipped up to expose the white lining.
Clear as mud?
Use your hemmed lining piece on the bottom tier. Actually, this piece is not totally essential to the curtain, but it gives the curtain more weight and helps it lay (lie?) nicer.
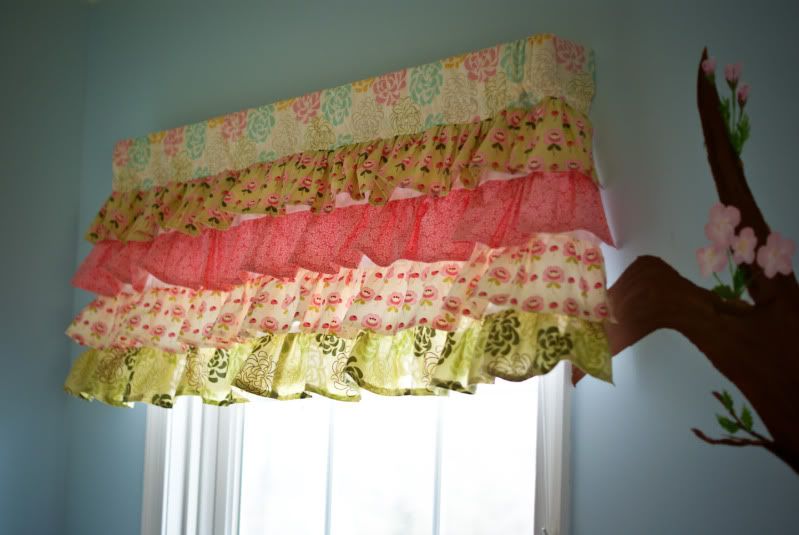
Stand back and admire your pretty, ruffled, tiered curtain!
And then make another for the other window. ;)
If you have any questions, please leave them in the comments and I'll do my best to answer them. You know, if I'm not giving birth or something. 2 weeks to D-day! Can't wait to share the baby projects I'm working on! That is...if I ever finish them.
The idea for these curtains actually came when I was sketching out a birthday outfit for my girl and it dawned on me that I could apply the same principle of ruffled tiers to curtains! I am so, so happy with how they came out, and my girl just loves them. Well, as much as an almost 3 year old can love curtains. :)
Cute, right?

I took pictures so I could share a quick tutorial with you guys! These are really pretty simple to make, just a little time consuming.
CUT:
Important note: I made these to fit the 3 inch curtain rods that were already in her room - if you want to make them to fit a traditional pocket rod, you'll need to adjust the pocket measurements. Her windows are 39" wide from molding to molding.
Pocket fabric - This is the fabric that will hold your curtain rod. For my 3" rod, I cut a piece
55" x 7.5" - cut one
White lining fabric - 55" x 4.5" - cut four
Fabric for tiers - 90" x 5" - cut four (note: Since this is going to be gathered, don't sweat the length of these tiers too much. I wanted to double the length, but my fabric was 45" wide, so I just cut two pieces that I then pieced together to make one long piece. You probably will have to piece these tiers together unless you're working with a large cut of fabric, but since they'll be gathered, the seams will be virtually invisible.)

Okay, now head to your ironing board.
Here is where you need to figure out the width of your curtain rod. Mine is 3", so ironed over a 1/4" and then measured exactly 3 1/4" and folded and ironed the fabric like this:

Iron down a 1/4" of the bottom of each tier and the ends of the pocket fabric and white lining pieces.
Only ONE white lining piece will need to be hemmed - the piece attached to the bottom tier. I cheated and used a piece I had cut on the selvage and just trimmed it down an inch so it wouldn't show under the last tier. Otherwise, you'd want to iron and hem this piece up about an inch.

I didn't enclose my raw edge. I kind of figured that 1) no one is going to look and 2) how often do you really wash curtains? They just kind of hang there so I wasn't too worried about durability. If you want to do this, I'd add another 1/4" to your cuts.
Now we're ready to sew! Ready?
Sew down the ends of your top pocket piece and then sew down the length of the piece, creating the pocket for the curtain rod.
 Sew down the ends of your long tiered pieces and then hem the bottom edge.
Sew down the ends of your white pieces and just hem that one piece. Both edges of the other three will be sewn, so leave those raw.

Now we're ready to put in our gathering stitches! Set your stitch length to the longest it will go, give yourself about a 6" tail of thread and sew a straight line 1/4" from the edge along the top of the tier. Don't backstitch! Gather your tiers by gently pulling the bobbin thread. Repeat with all four tiers.

Now we're ready to assemble the valance!

Each tier with have THREE layers. Lay your first tier on top of our pocket piece, right sides facing, raw edges aligned. Now you will need to evenly distribute your gathers along the length of the pocket piece. Lay one of your unhemmed white pieces on top of your gathered piece, sandwiching your gathered tier. Like this:

Pin very well, taking care to make sure that all three raw edges are lined up. I'm a lazy seamstress and if I can get away with not pinning, I will. You NEED to pin this one, folks.

Head to your machine and using a 1/2" seam allowance, sew the three layers together.

Remove pins and flip down your first tier! Remove any of the gathering stitching that may be visible and iron down. See how pretty?

Now continue to attach the remaining tiers in the same way by flipping up the first tier and aligning the raw edge of the white lining piece (see it peeking out up there?) with the raw, gathered edge of the next tier. Distribute gathers, and then sandwich the tier with another white lining piece.
Here's a picture of my 2nd sewn tier. You can see the first tier flipped up to expose the white lining.
Clear as mud?

Use your hemmed lining piece on the bottom tier. Actually, this piece is not totally essential to the curtain, but it gives the curtain more weight and helps it lay (lie?) nicer.

Stand back and admire your pretty, ruffled, tiered curtain!

And then make another for the other window. ;)

If you have any questions, please leave them in the comments and I'll do my best to answer them. You know, if I'm not giving birth or something. 2 weeks to D-day! Can't wait to share the baby projects I'm working on! That is...if I ever finish them.
Molly
Linking up to the following parties:


I love these SO SO SO much!!!
ReplyDeleteSo cute! I love Hunky Dory fabric too. That's what I made my daughter's quilt out of.
ReplyDeleteI found your tutorial looking for instructions on making a toddlers tiered ruffled skirt and this was the closes i could find to the type of ruffles i was looking for. so if you're making a skirt like this are all of the white dropdown pieces the same length? would you have any idea on that?
ReplyDelete@ Anon - I'm actually in the progress of making a skirt based on this idea! I want mine super full and twirly, so I'm doubling the size of each "white" or base piece as I go. You certainly don't have too, though. Just make sure that your first tier is plenty full so you don't have a problem with it being too straight. The way I would do it is too sew each tier (and "white" pieces) in a circle before gathering and attaching them. I'll admit, I wrapped this curtain around my waist when it was finished and it was pretty darn cute. ;) Hope your skirt turns out well!
ReplyDeleteThat is gorgeous! I need to make some curtains for my little girls room and I'm thinking some {ruffly} ones like your just might the perfect pattern. Thanks for posting a tutorial. I love your fabric too. :-)
ReplyDelete-Mariesa
http://tencowchick.com
Oh my word! This turned out SO adorable!
ReplyDeleteWould love if you shared at my link party
http://haybirdblog.blogspot.com/2011/02/fluff-your-feathers-and-strut-your.html
What a sweet valance. Excellent tutorial and good pictures. Love this!
ReplyDeleteI love this idea, will also make a vanity skirt to match!
ReplyDeleteMy granddaughter Madalynn just got a new bedroom, cannot wait to help decorate it!
ReplyDeleteHi Molly...I love these curtains! They are so cute! I'm planning to make some for my college dorm room...but I have a question before I start. The width of your window was 39 inches...but the width of your fabric pieces was 55...was that because your curtain rod seemed to wrap around the window a little bit? I started planning mine out and it I realized the width seemed kind of long. My window width is 41 inches, so not too far off...but the curtain rod I am allowed to use at school is the kind that just stretches from one side of the window to the other to hold it in place. How many inches do you think I should use for the width of each piece? Thanks so much.
ReplyDelete@Anon - Thanks! I think I'd probably keep it the same. My rods do stand about 2 inches out from the wall, so that would make up the difference. I'd love to see pictures when you're finished! :)
ReplyDeleteOk! Thanks for your reply. It sure is a tedious process but I'm anxious to see how they'll turn out.
ReplyDeleteI am so pleased that your instructions turned up when I yahoo searched. Thank you so much for your detailed tutorial! I have very limited sewing experience so I was a bit nervous on if I would just end up wasting material. I made the valance this weekend for my just turned 3 year old daughter and it turned out beautiful! Thank you!!
ReplyDelete-Stacey
These are adorable! I love ruffles on anything. I love ruffled aprons and these are perfect for craft rooms, bedroom and all over the house! I am going to use this idea for our new house! Thank you so much for the wonderful tutorial.
ReplyDeleteThese are adorable! I love ruffles on anything. I love ruffled aprons and these are perfect for craft rooms, bedroom and all over the house! I am going to use this idea for our new house! Thank you so much for the wonderful tutorial.
ReplyDeleteLoved this tutorial! Thanks for sharing.
ReplyDeleteThis comment has been removed by a blog administrator.
ReplyDeleteI'm going to attempt next week. I made a bed skirt with tiered ruffles in the fall , but didn't line each piece. They were all attached to 1 piece of muslin. Would it make a difference how the valance lays? http://lucasandemilyhowell.blogspot.com/search/label/bed%20skirt
ReplyDeleteThank you for this tutorial! I used it to make a ruffled valence for a friend of mine, but had to make it 8 feet long! I linked back to you from my blog: http://simplejoycrafting.blogspot.com/2013/10/ruffled-valence.html
ReplyDeleteHow many yards of each fabric did you use?
ReplyDeleteLove this idea for my camper going to make an apron to match and possibly a must ruffle for the bed to pull it all together! Just wish I had a video! Great idea for countryside
ReplyDeleteI love this! I'm a very novice seamstress, so I have what might be a dumb question. After you pull the bobbin thread to make the ruffles, do you tie it somehow to keep the ruffles in place or do you just pin it as described above without tying it off first? I'm picturing the ruffles going flat if you don't somehow tie it... but again, I have no idea what I'm doing so LOL
ReplyDeleteThe pictures aren't showing up? It says something about updating a photobucket account to enable 3rd party hosting. Is this something wrong on your end or mine? Would live to be able to see the pictures to help clarify the steps!
ReplyDelete